Homebridge setup for QwikSwitch#
Introduction#
We now have our QwikSwitch devices installed and setup, as per this document: Install QwikSwitch Hardware
We will go through the steps of setting up each QwikSwitch relay to homebridge, so that we can contol our devices via Apple HomeKit.
You will need a Raspberry Pi, setup with Raspberian and Homebridge.
You will need to have your QwikSwitch cloud account with your devices added:
API Calls#
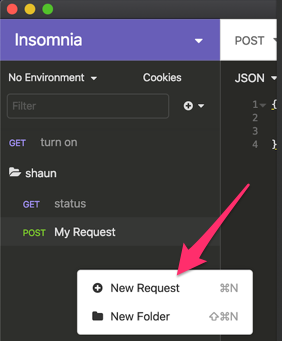
You will need an api client, like insomnia to connect to your QwikSwitch account and build the xml:
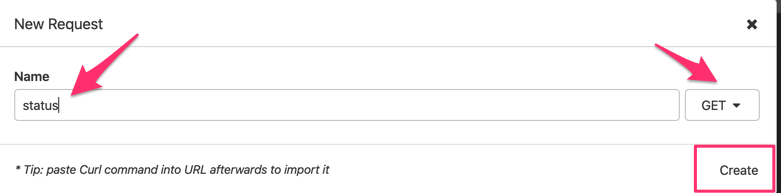
Right click and then click on "new request".
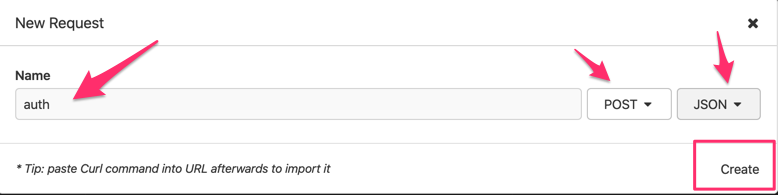
Call it "auth" and select "POST" and change "no body" to "JSON" then click on "Create".
You will need your email address from your QwikSwitch account, as well as the cloud key, printed on your WIFI bridge:
- email: Email address from your QwikSwitch account
- masterKey: Cloud key, printed on your WIFI bridge
- url: https://qwikswitch.com/api/v1/keys
Paste in the following:
{
    "email": "youremail@gmail.com",
    "masterKey": "12er569fetp"
}
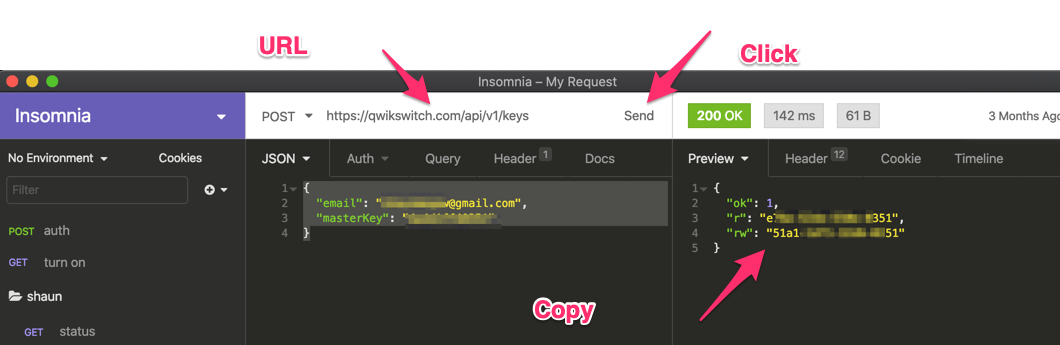
Next to "POST", paste in the following url:
https://qwikswitch.com/api/v1/keys
Now click on "Send"
Copy the output "rw": XXXXXXXXX This is your api key.
Right click and click on "new request"
Call it "status" and select "get" and then click on "create"
Add the following URL, replacing XXXXXXX with your api key you got in the auth step above.
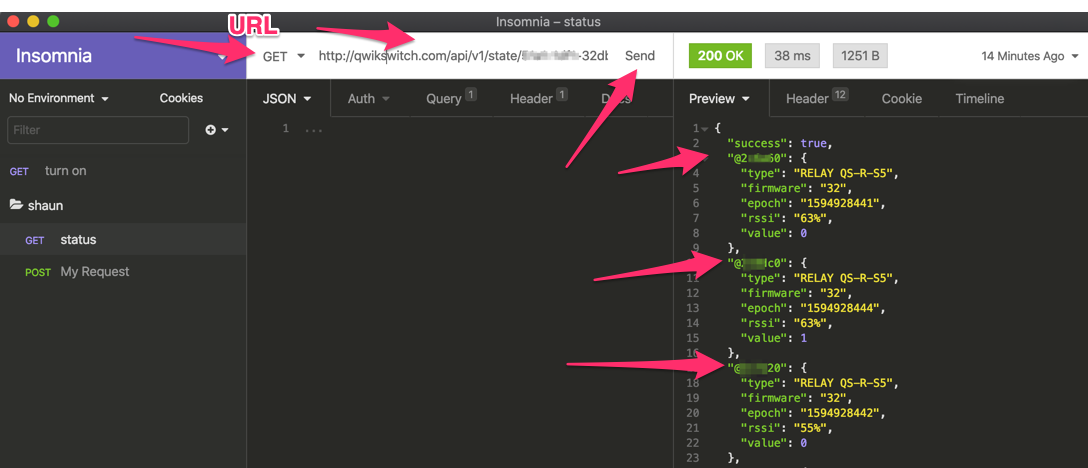
Next to "GET", paste in the following url:
http://qwikswitch.com/api/v1/state/XXXXXX/
Now click on "Send":
Note
Make a note of the order of the devices, as this is how you will need to add them to homebridge.
Homebridge#
Connect HomeBridge To Your Apple HomeKit#
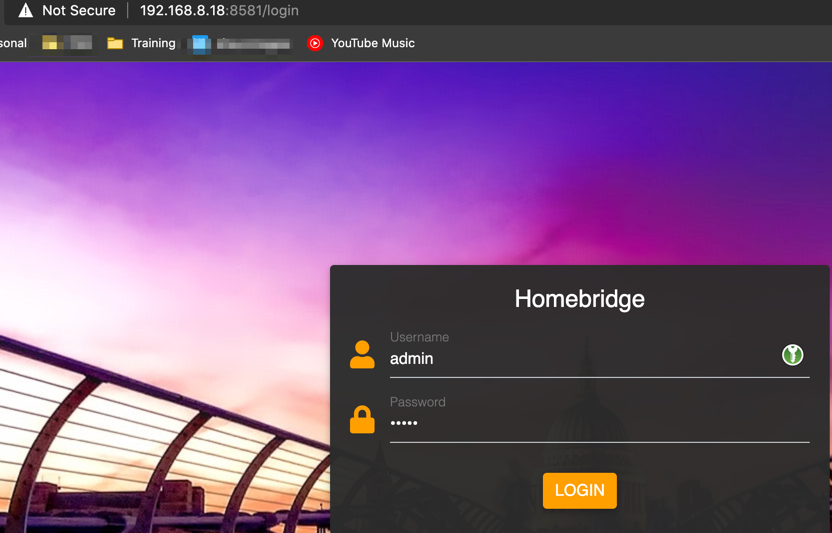
Navigate to the ip of your homebridge server and login with:
- Username: admin
- Password: admin
Note
http://ip.of.pi:8581
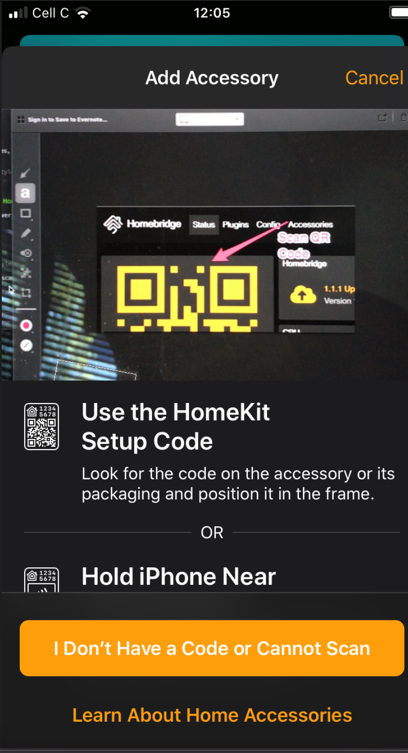
You will see a QR code, you will need to scan this code with your iphone
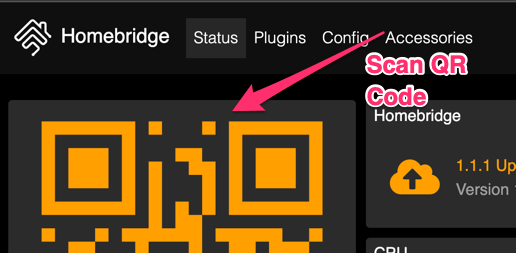
Open Apple HomeKit on your iphone and click on the + and then click on "Add Accessory".
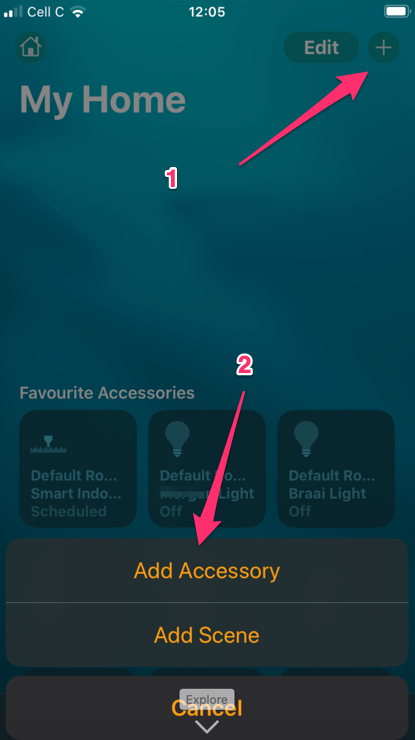
Now scan the QR Code on the homebride web page, and this will add HomeBridge as a bridge to your account.
Accessories#
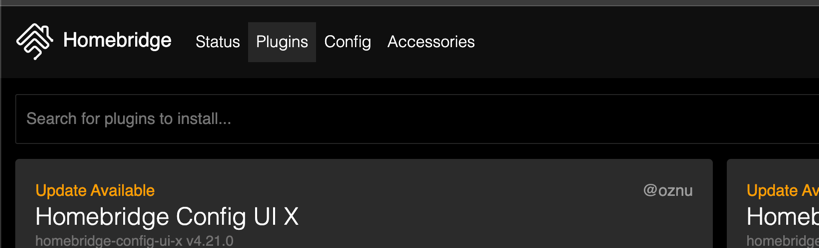
Go back to your Homebridge web GUI and click on Plugins and install the following 2 plugins:
- homebridge-http-lightbulb
- homebridge-http-switch
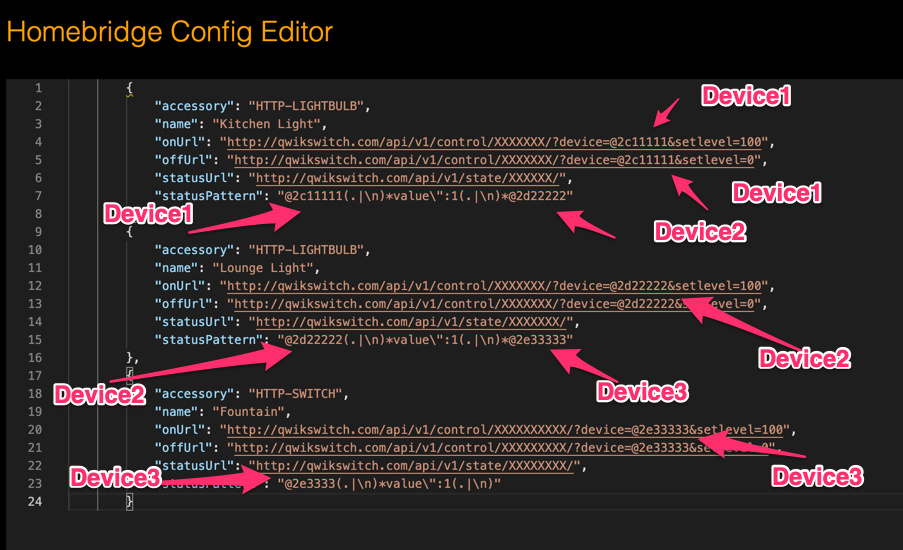
Click on "Config" and and replace the contents of accessories with the below:
Note
Replace the following with your settings:
- XXXXXXXX - api key
- @2c11111 - Qwikswitch replay device 1
- @2d22222 - Qwikswitch replay device 2
- @2e33333 - Qwikswitch replay device 3
    "accessories": [
        {
            "accessory": "HTTP-LIGHTBULB",
            "name": "Kitchen Light",
            "onUrl": "http://qwikswitch.com/api/v1/control/XXXXXXX/?device=@2c11111&setlevel=100",
            "offUrl": "http://qwikswitch.com/api/v1/control/XXXXXXX/?device=@2c11111&setlevel=0",
            "statusUrl": "http://qwikswitch.com/api/v1/state/XXXXXX/",
            "statusPattern": "@2c11111(.|\n)*value\":1(.|\n)*@2d22222"
        },
        {
            "accessory": "HTTP-LIGHTBULB",
            "name": "Lounge Light",
            "onUrl": "http://qwikswitch.com/api/v1/control/XXXXXXX/?device=@2d22222&setlevel=100",
            "offUrl": "http://qwikswitch.com/api/v1/control/XXXXXXX/?device=@2d22222&setlevel=0",
            "statusUrl": "http://qwikswitch.com/api/v1/state/XXXXXXX/",
            "statusPattern": "@2d22222(.|\n)*value\":1(.|\n)*@2e33333"
        },
        {
            "accessory": "HTTP-SWITCH",
            "name": "Fountain",
            "onUrl": "http://qwikswitch.com/api/v1/control/XXXXXXXXXX/?device=@2e33333&setlevel=100",
            "offUrl": "http://qwikswitch.com/api/v1/control/XXXXXXXXX/?device=@2e33333&setlevel=0",
            "statusUrl": "http://qwikswitch.com/api/v1/state/XXXXXXXX/",
            "statusPattern": "@2e3333(.|\n)*value\":1(.|\n)"

        }
    ],
    "platforms": [
        {
            "name": "Config",
            "port": 8581,
            "platform": "config"
        }
    ]
}
You must keep your device id in the exact order of the output of your api call.
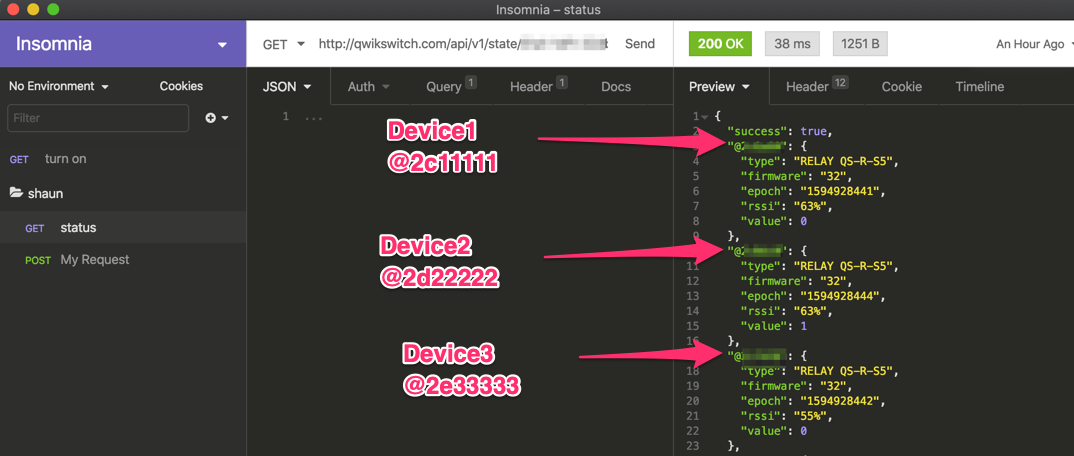
Note the order in StatusPattern.
StatusPattern is a regex between 2 devices, so you have to have the 2 devices in order to get the correct on and off status.