Configure a Tuya smart switch to run locally and connect it to homebridge.#
Introduction#
I initially setup the Tuya smart switch cloud to connect to homebridge, just to find out a month later that it was a trial and that the cost would be $25 000 a year.
We will go through the instructions on how to connect locally to the Tuya switch via homebridge.
Setup Device#
Note
You need to have an existing cloud setup https://developer.tuya.com/en/docs/iot/smart-home-quick-start?id=Kbvwrxn6mngbd
Log onto the Tuya platform
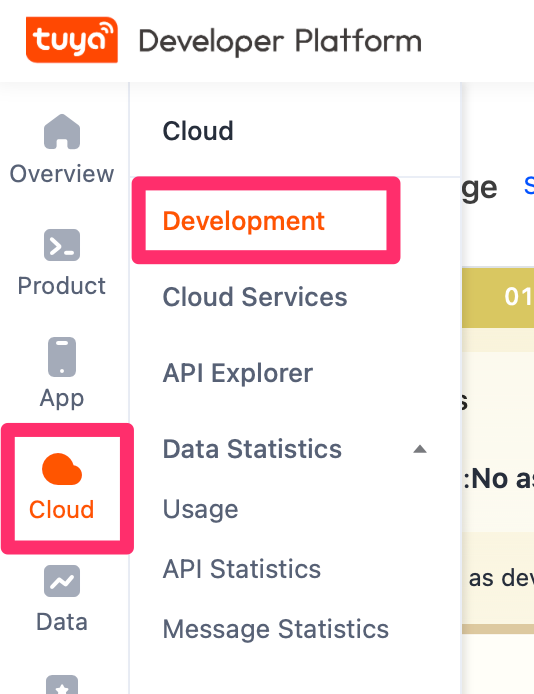
Go to Cloud -> Development and click the project you created earlier.
Click the "Devices" tab. Click the "Link App accounts" tab, and select the right data center in the upper right dropdown (eg Western America).
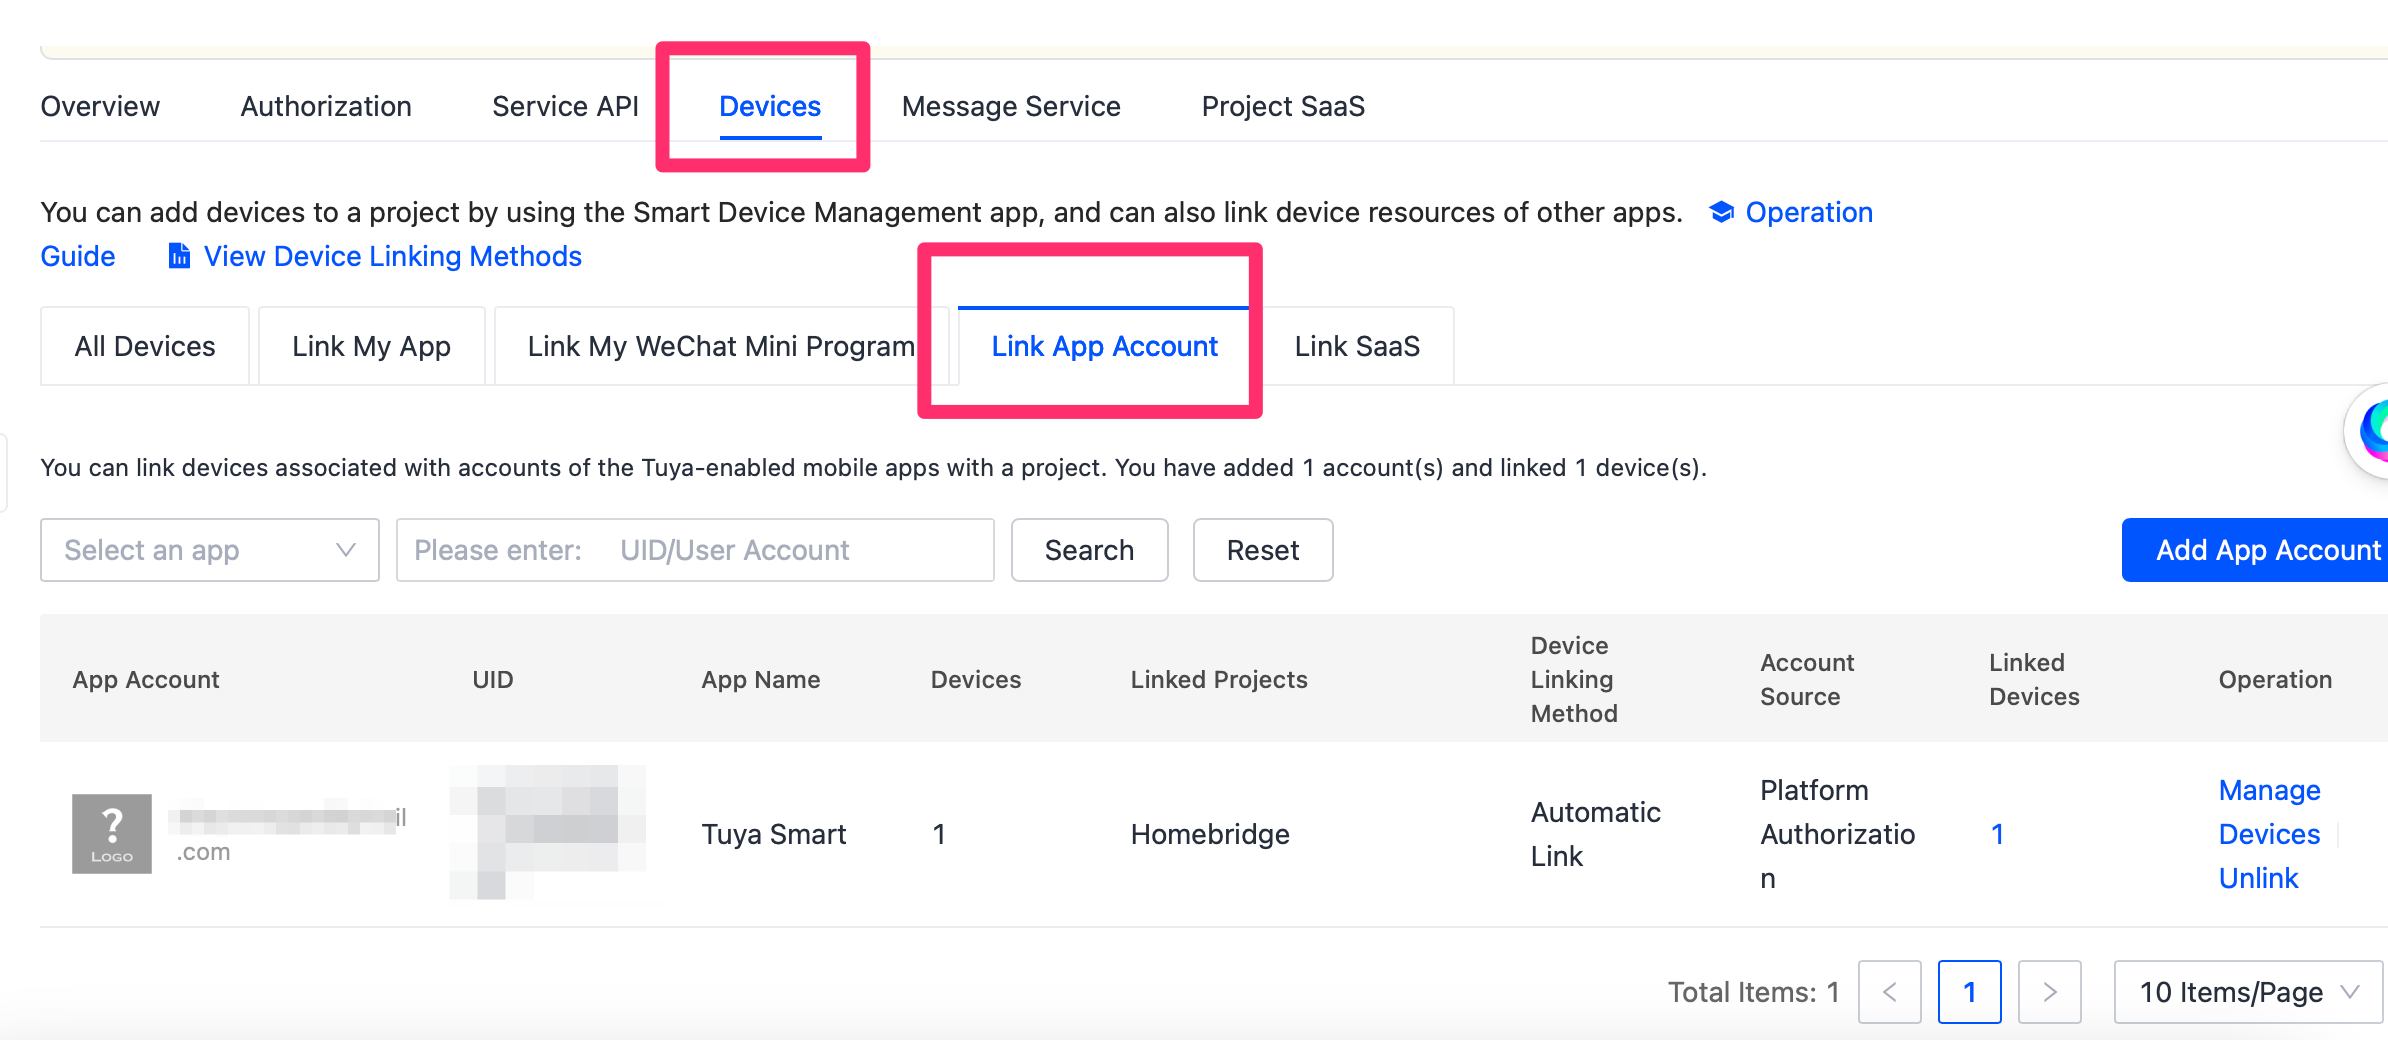
Click "Add App Account" and scan the QR code from your smart phone/tablet app by going to the 'Me' tab in the app, and tapping a QR code / Scan button in the upper right. Your account will now be linked.
Get API key and API secret#
Go to Cloud -> Development and click the project you created earlier.
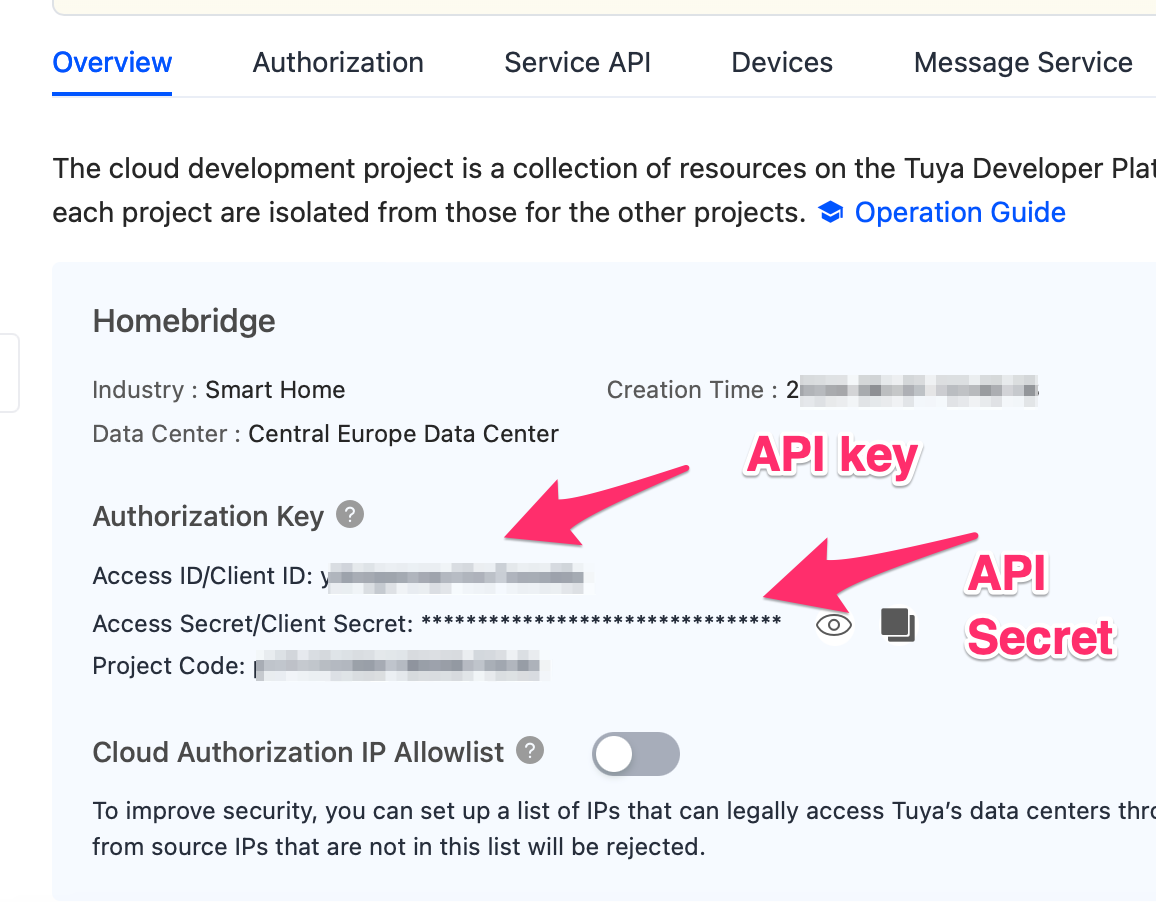
Click on Overview:
The "Access ID/Client ID" is your API key
The "Access Secret/Client Secret" is your API Secret
To get the Virtual ID:
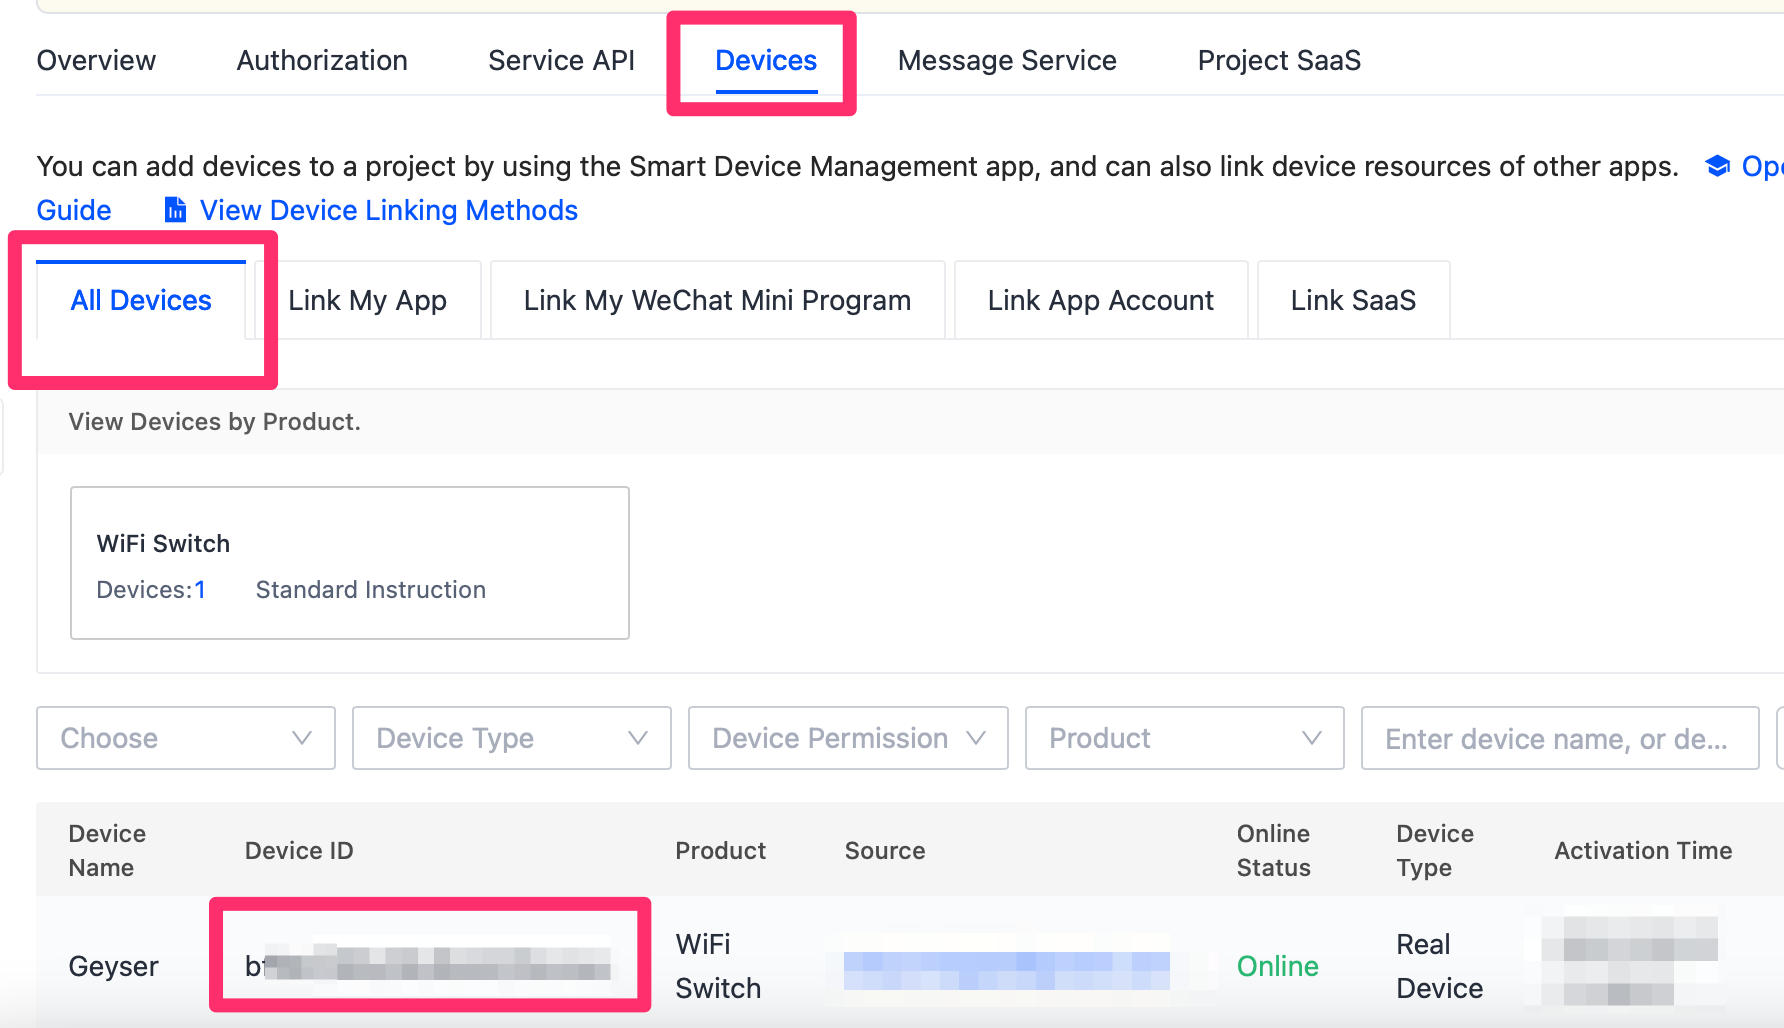
Click on "Devices" > "All Devices"
Connect#
From your homebridge server running on your Raspberry Pi run the following commands:
ssh pi@homebridge.ip.address

sudo apt-get install npm

sudo npm i @tuyapi/cli -g
Note
Get the info for the wizard from te step above:
tuya-cli wizard
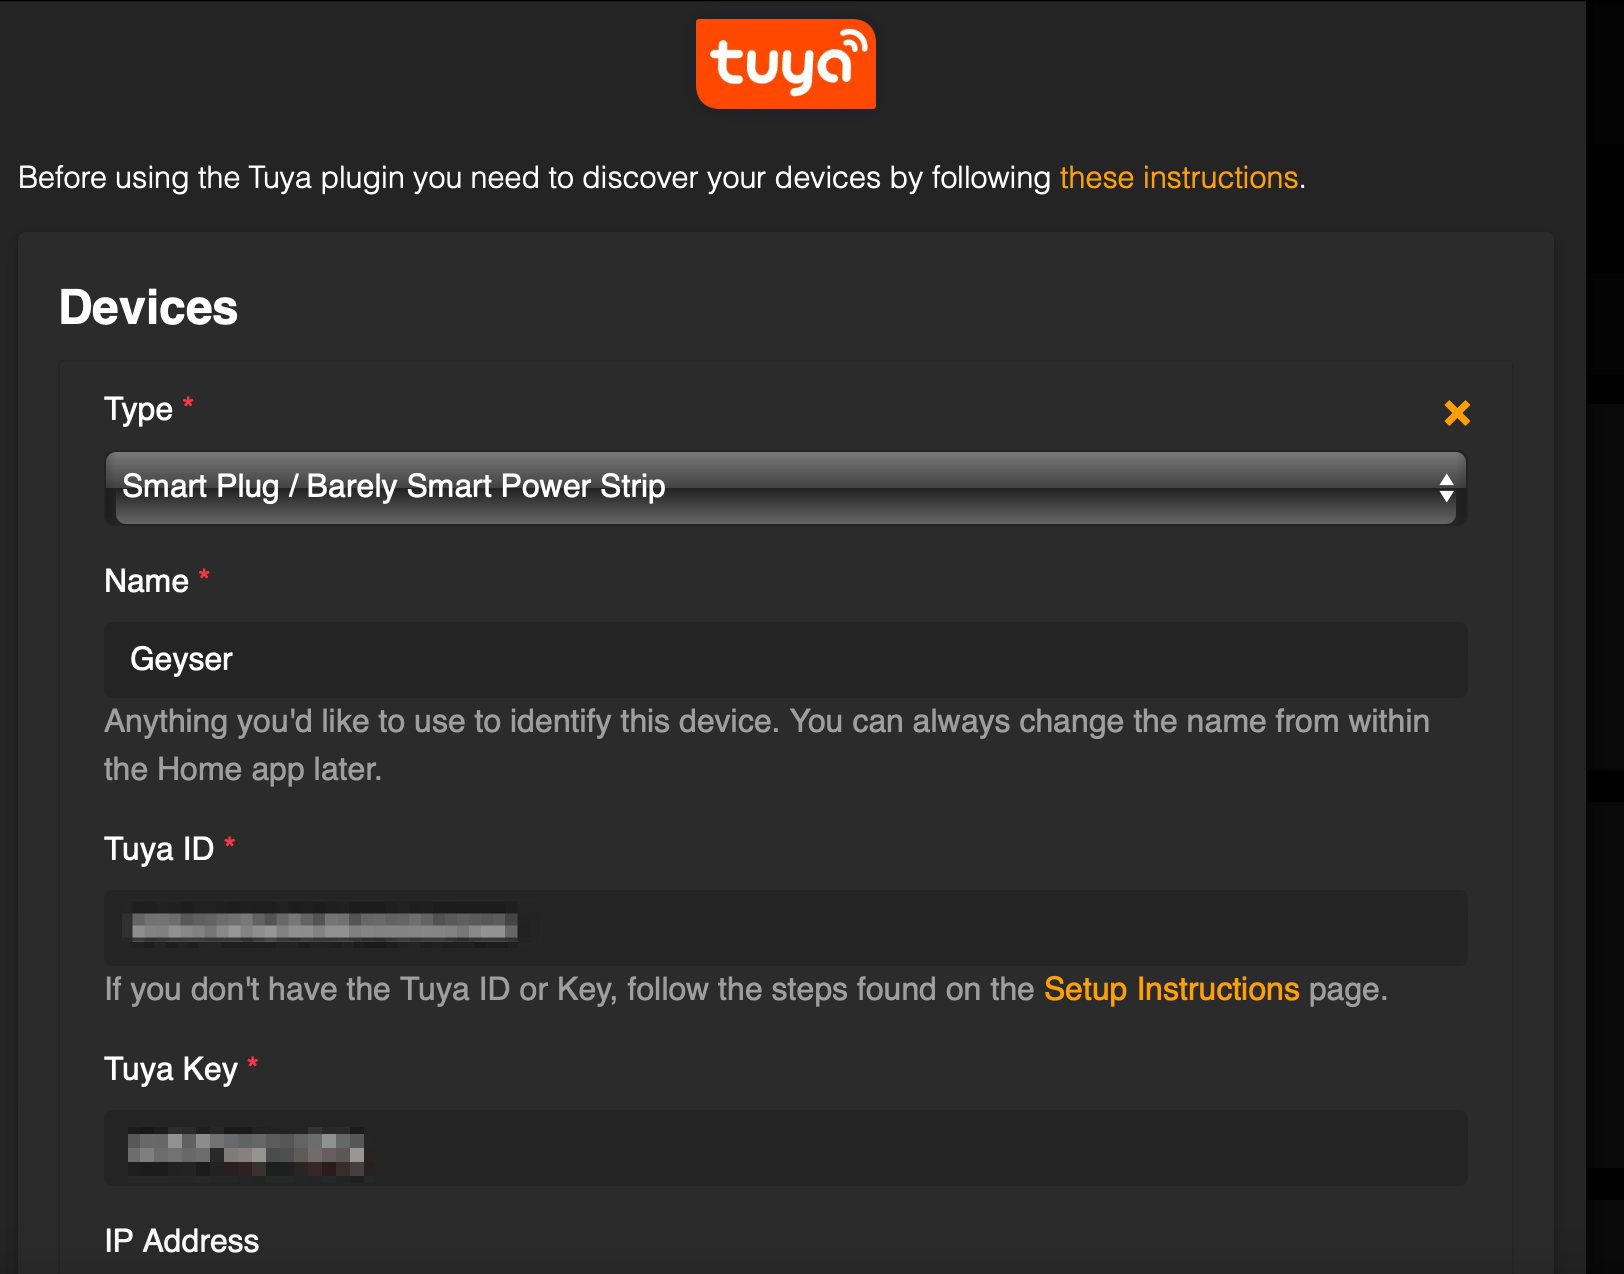
Add to homebridge#
Click on Plugins and search for "homebridge-tuya" and then install
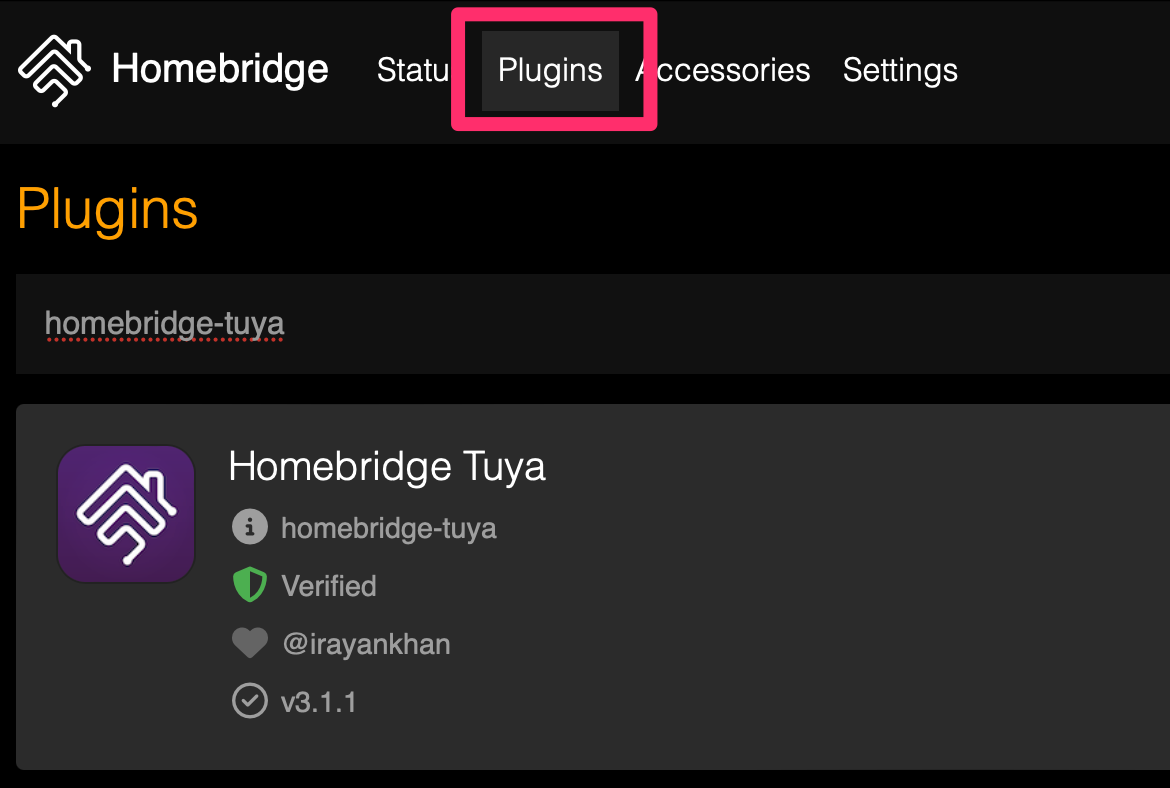
Once installed, select "Smart Plug / Barely smart power strip from the dropdown.
Add in the "Name", "Tuya ID" and "Tuya Key" which you got from the "tuya-cli wizard" output above.